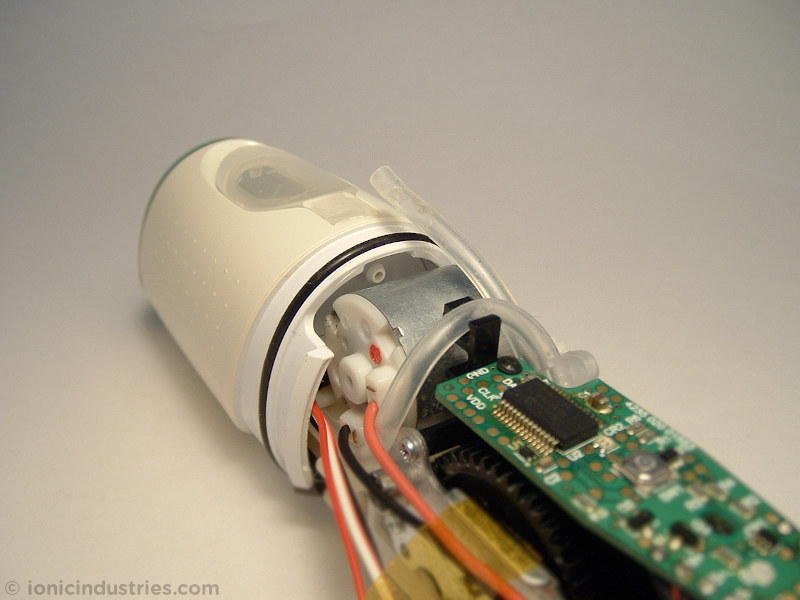
In this guide we show you how to open up the Philips Sonicare AirFloss dental flosser to replace the internal battery.
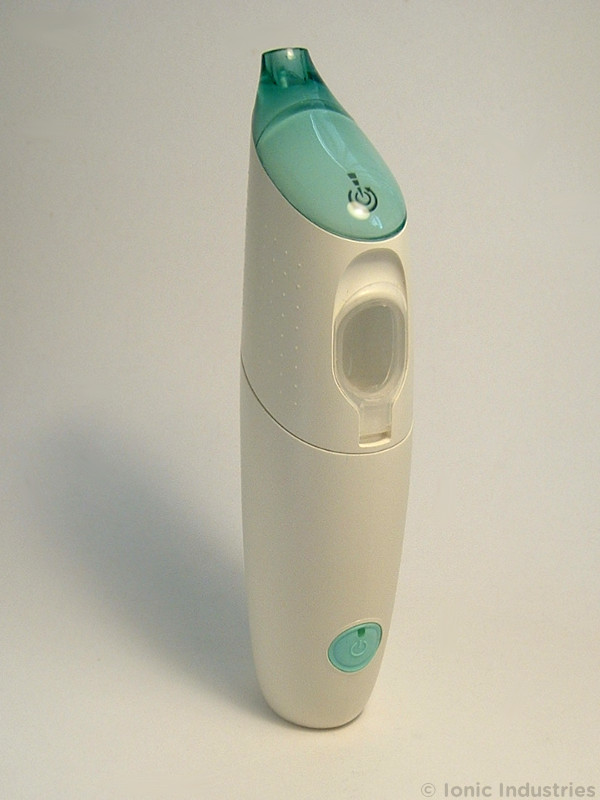
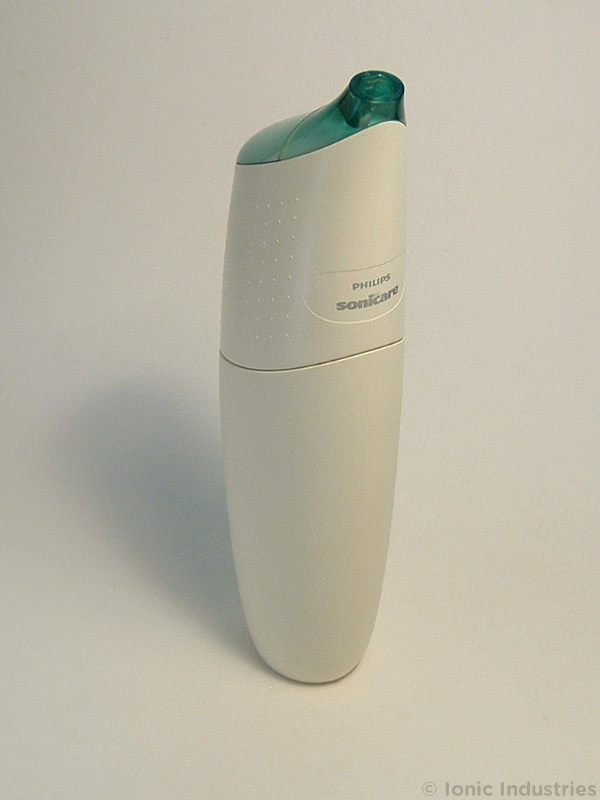
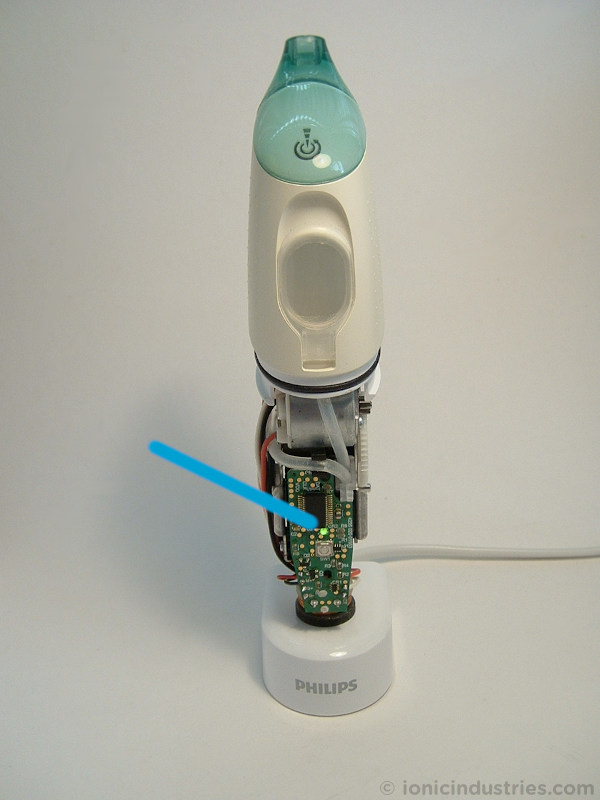
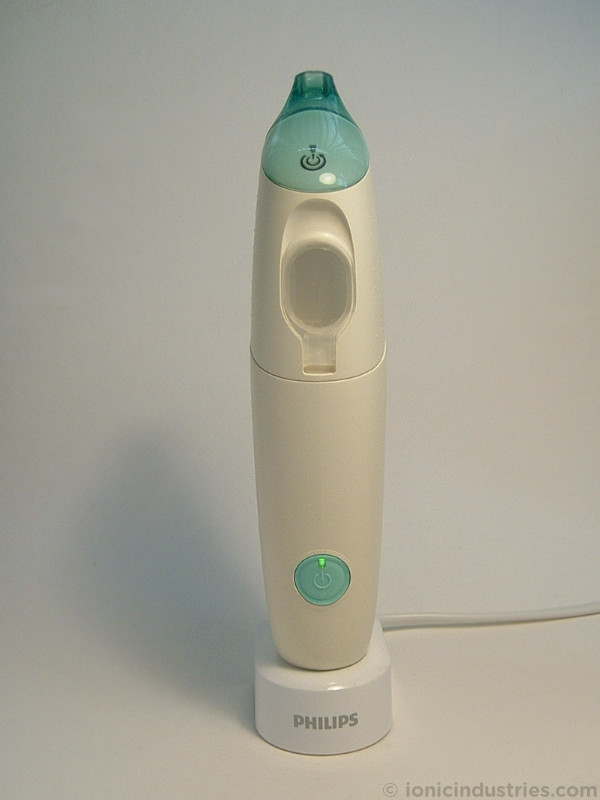
This disassembly and repair tutorial is based on the HX8240 AirFloss as shown in the photo above, but is applicable to the other AirFloss flosser models in the Philips Sonicare range including those listed below. You can find the HX number of your Philips AirFloss interdental cleaner marked on the bottom of the handle, as shown in the example arrowed below.

This guide applies to Philips Sonicare AirFloss models with the following HX numbers, amongst others:
- HX8100 series, including HX8110, HX8111, HX8120, HX8130, HX8140 and others starting HX81
- HX8200 series, including HX8210, HX8211, HX8212, HX8220, HX8222, HX8230, HX8240, HX8241, HX8260, HX8261 and others starting HX82
- HX8300 series, including Airfloss Pro/Ultra, HX8310, HX8311, HX8312, HX8315, HX8316, HX8330, HX8331, HX8332, HX8340, HX8341, HX8350 and others starting HX83
- HX8400 series, including Airfloss Pro/Ultra, HX8410, HX8420, HX8430, HX8438, HX8440, HX8460, HX8462 and others starting HX84
The basic battery replacement method is:
- Open and dismantle your Philips AirFloss flosser
- Remove the old rechargeable battery
- Fit the replacement battery and solder the wires for the new battery
- Reassemble the AirFloss and recharge the new battery
The AirFloss battery replacement process is documented in detail below along with lots of pictures. Click on any photo to enlarge it.
Disclaimer
Any damage to yourself, your device or anything else is entirely your responsibility. This guide is for professional, educational purposes only and is offered without guarantee or liability. Lithium-ion (Li-ion) batteries are dangerous if short-circuited and can go into thermal runaway and self-ignite if you do not observe all handling precautions. Always wear safety glasses when soldering and cutting.
Tools / Parts / Equipment
- Philips Sonicare AirFloss flosser (interdental cleaner)
- Compatible charger
- Soldering iron: Electronics grade (about 18-25 watt)
- Solder: Lead-free silver solder is great for this
- Wire cutters
- Wire strippers
- Insulation tape or heatshrink
- Double-sided tape
- Replacement 3.7V Li-ion battery. Support us by buying yours from ToothbrushBattery.com here
How-To
To start with, remove the spray nozzle from your AirFloss and empty the water reservoir.
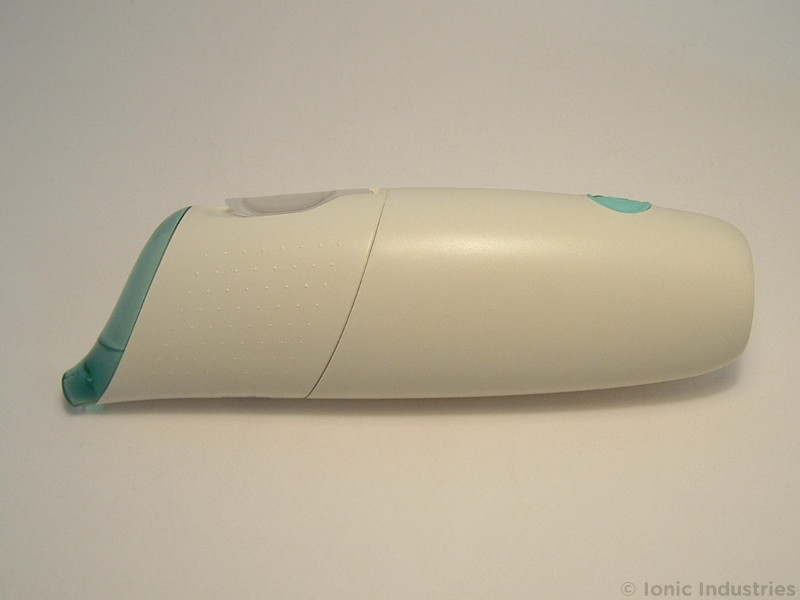
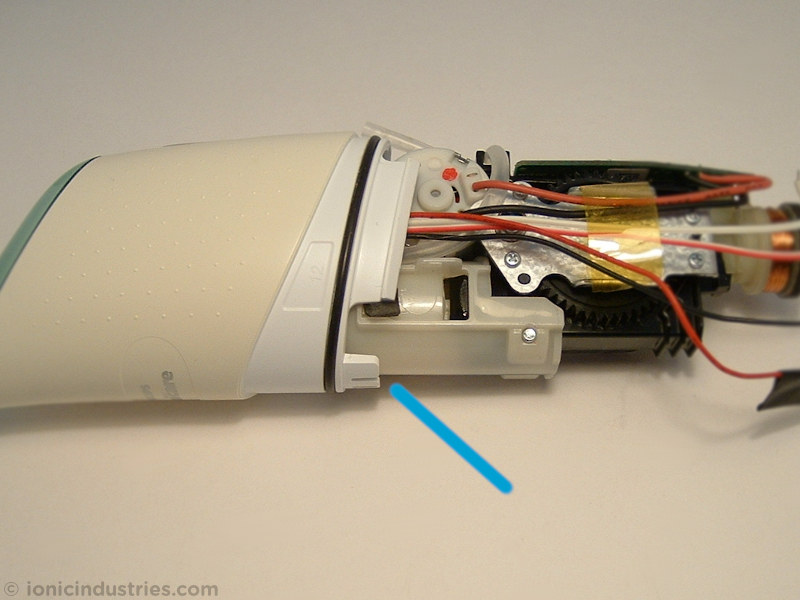
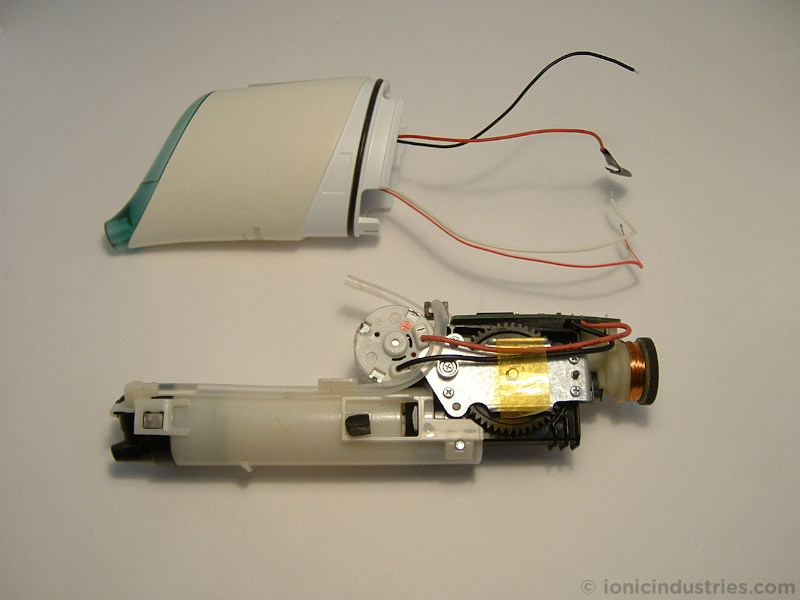
The AirFloss comes apart around a seam in the middle of the handle. Gradually pull and work the two halves apart while bending the AirFloss back and forth along its seam. Go slowly so you do not end up ripping the casing apart as you might end up breaking wires or knocking components off the PCB. If you have trouble grip the top half at the sides and squeeze the lower half front to back. This can help release the internal catches while you pull the casing open. If you come up with a better technique please let us know in the comments below!
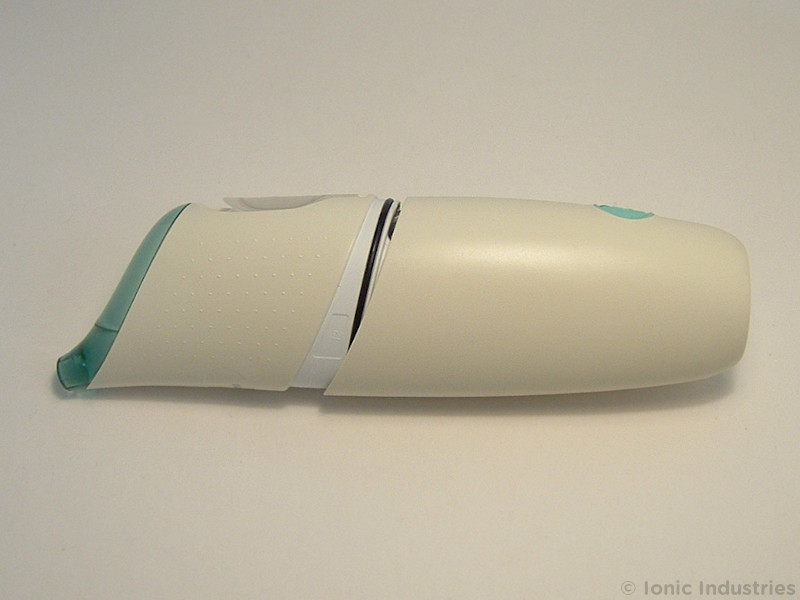
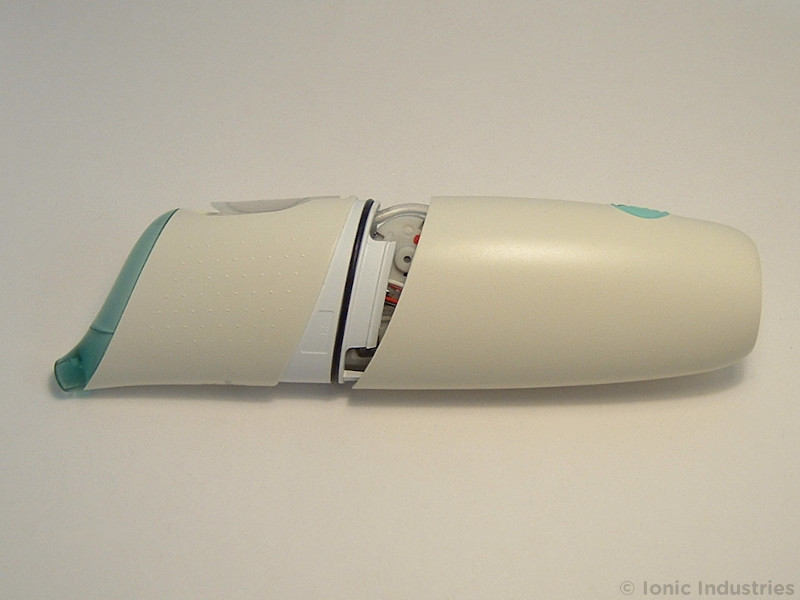
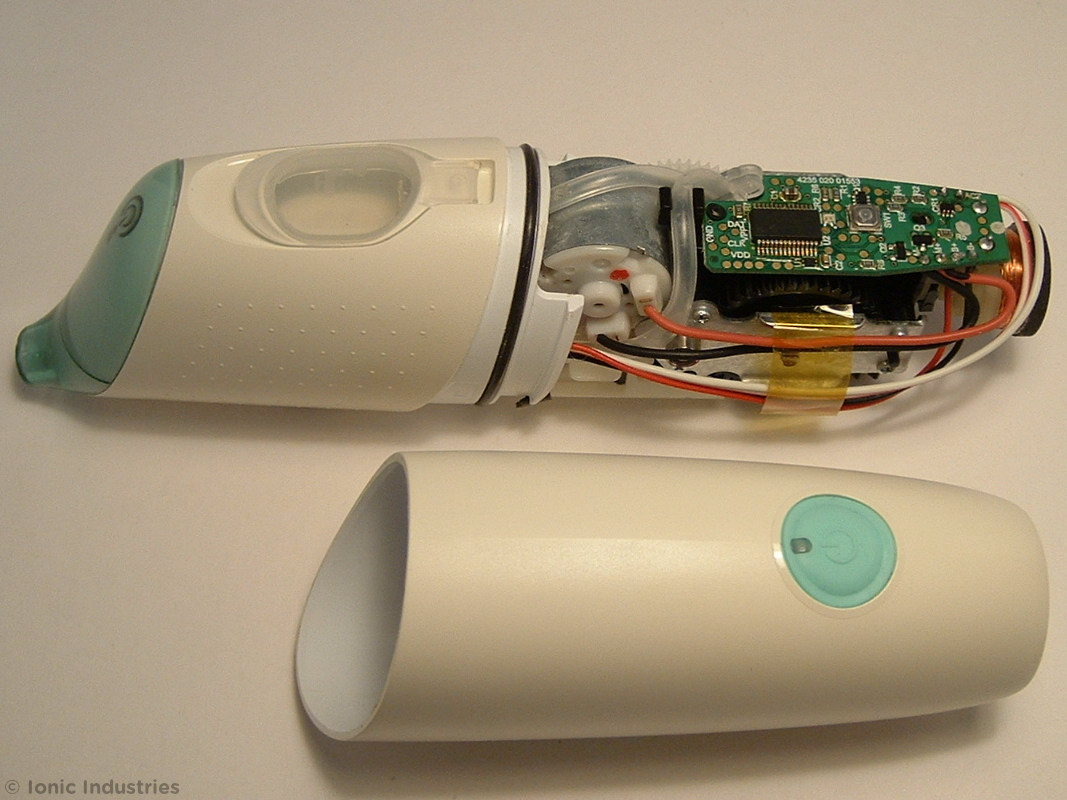
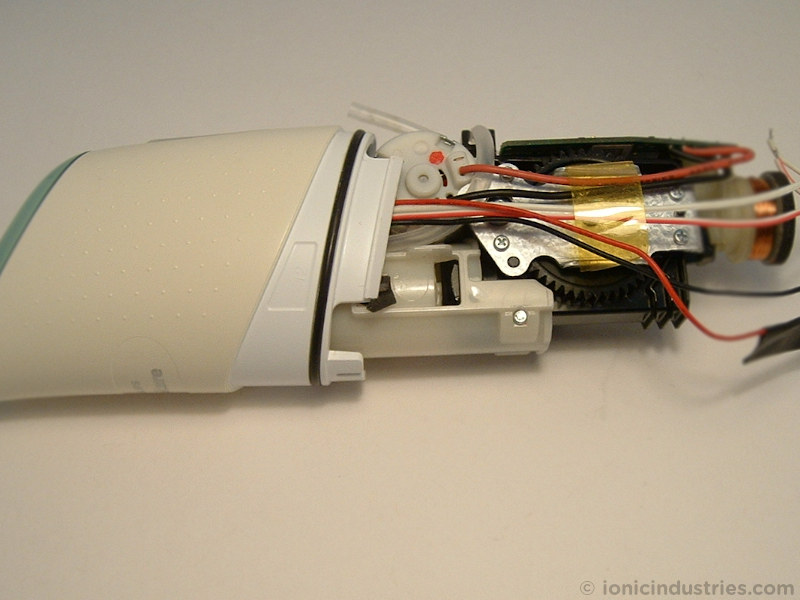
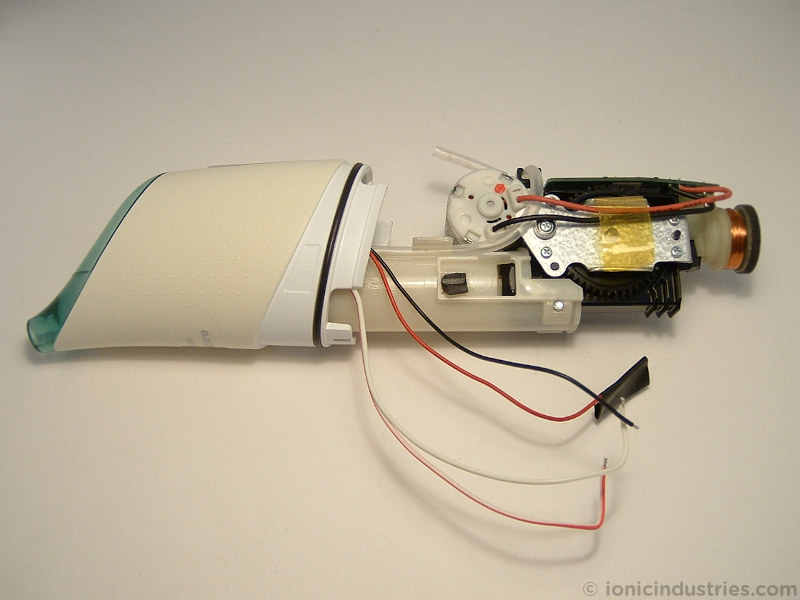
Slide the lower casing off the inner workings while leaving the internal mechanism in the upper casing.
Time to get your soldering iron warmed up!
Locate the two ACT wire connections on the PCB, arrowed below. These are for the activation button.
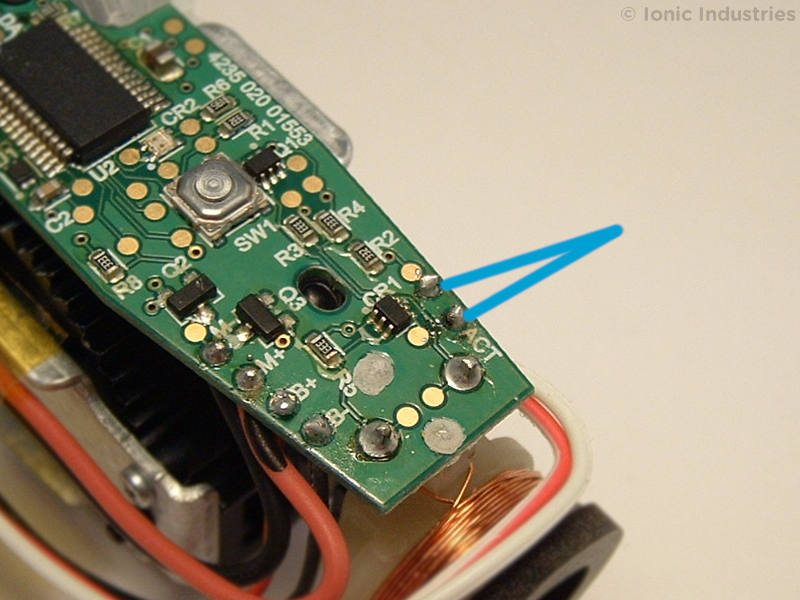
You can mark the PCB and one wire if you want to make sure you reconnect them to the same holes later. Desolder the two ACT wires and pull them down through the PCB.
Locate the B+ and B- connections on the PCB, arrowed below. B+ is the red (positive) battery wire, and B- is the black (negative) battery wire.
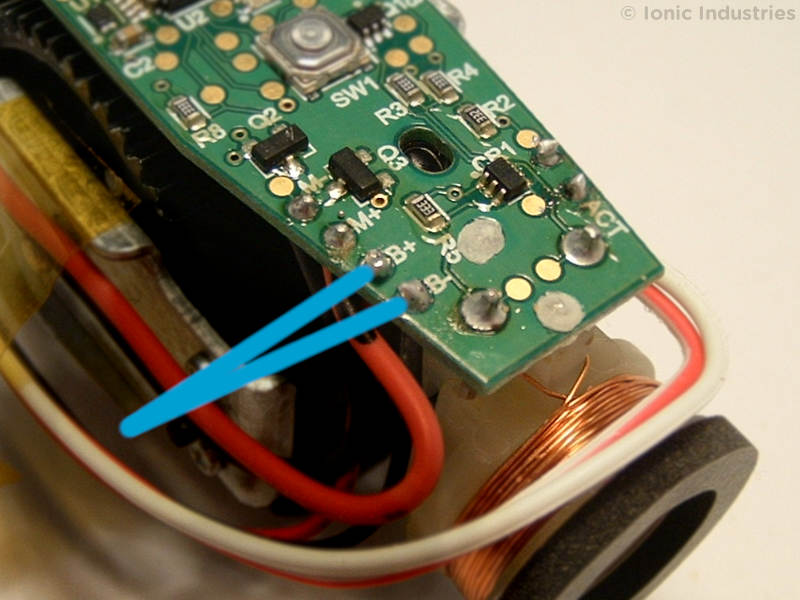
Desolder each battery wire in turn, and wrap the end of the first one in a piece of insulation tape to prevent short circuits.

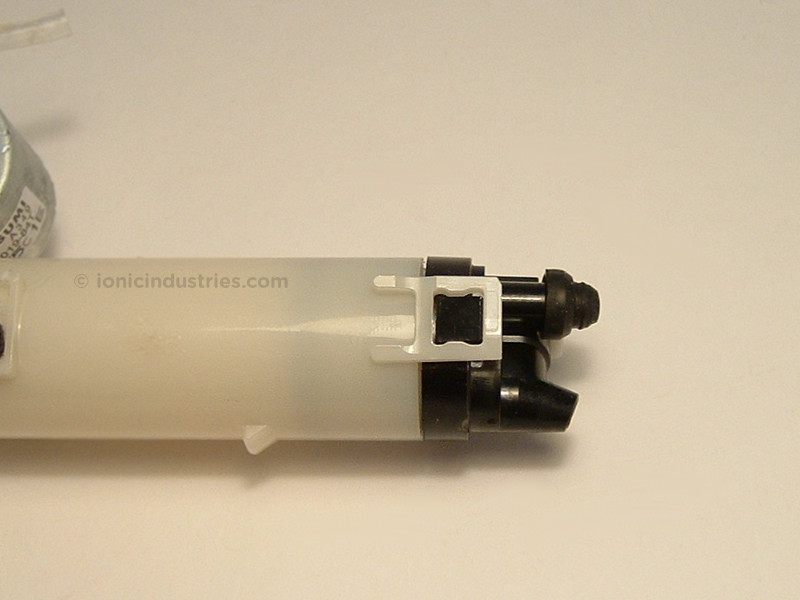
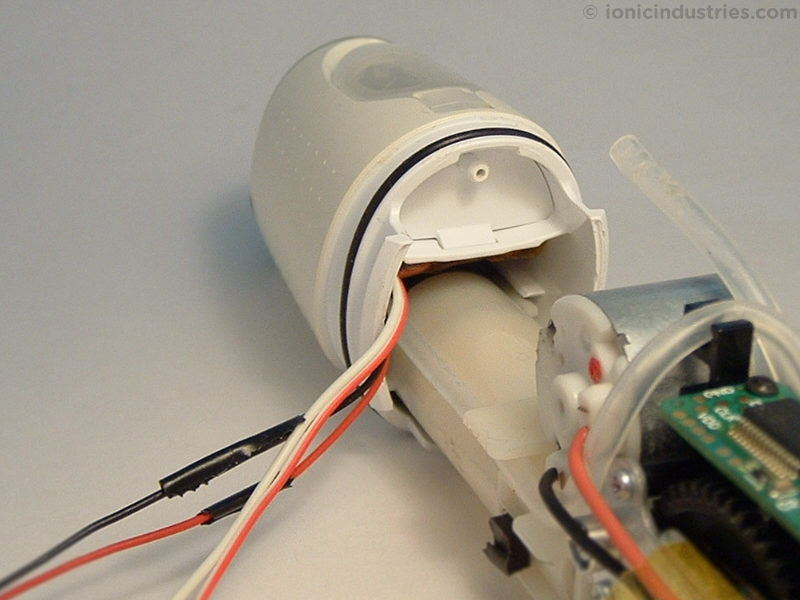
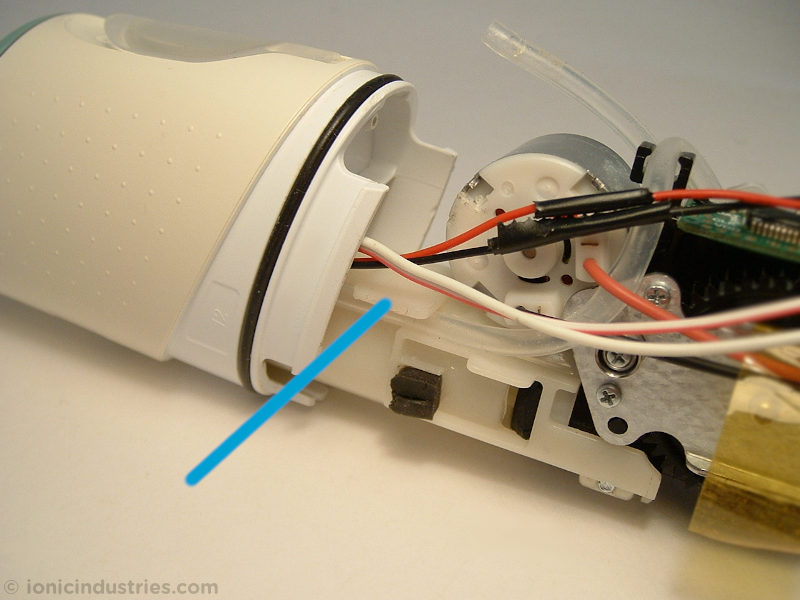
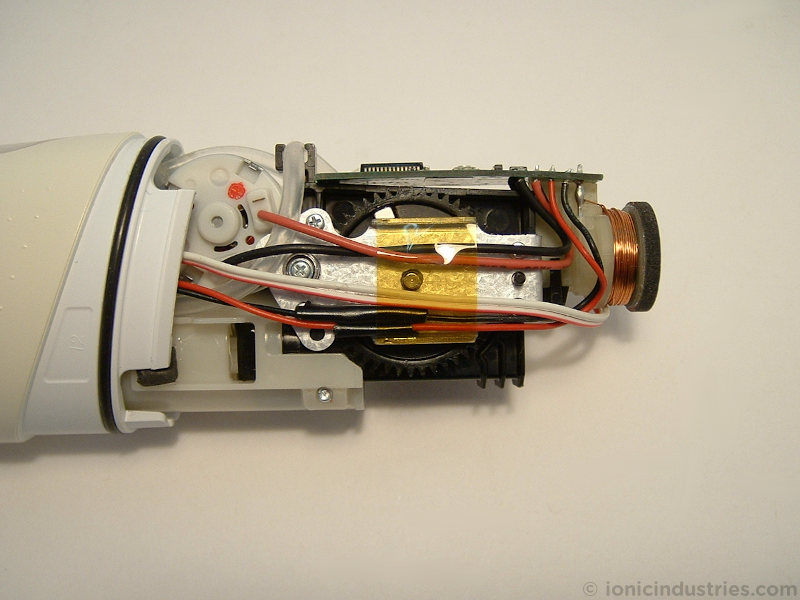
Locate the reservoir pipe as arrowed below, and pull it off the reservoir outlet to disconnect it.

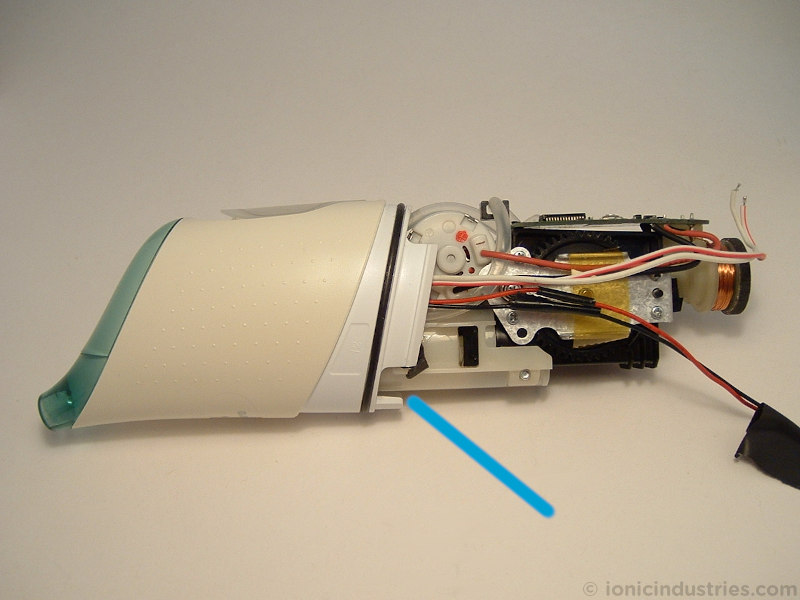
Push the internal assembly up and away from the front edge of the upper casing to unclip it. The gap arrowed below should widen.
Untape the battery and activation switch wires then slide the internal assembly out of the upper casing. This should leave the battery and the switch wires in the upper casing.

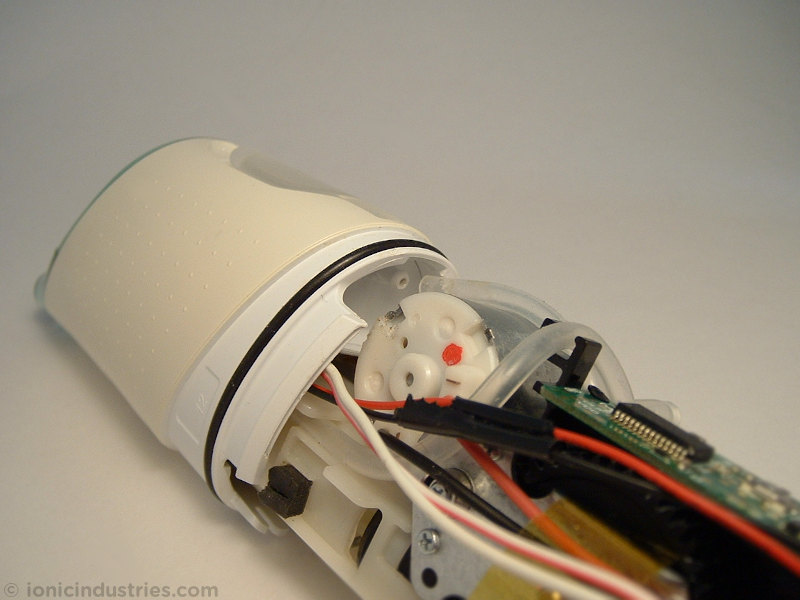
Check that the two black rubber grommets for connecting the pipework are fully located either in the upper casing or on the end of the internal assembly. Make sure these are both still properly seated for later reassembly.
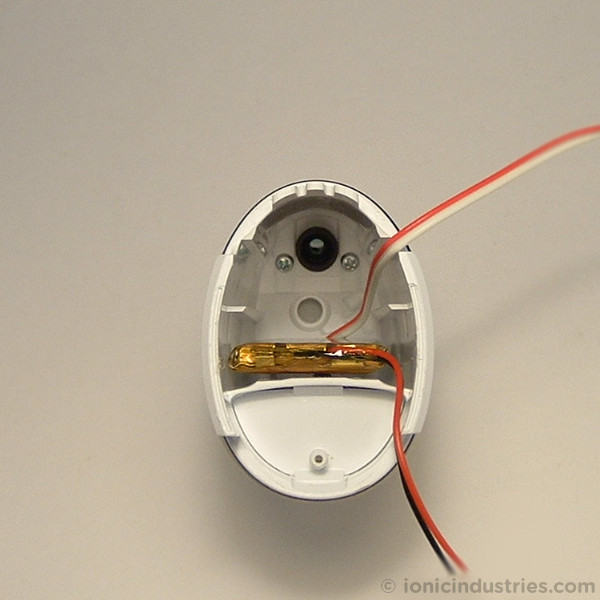
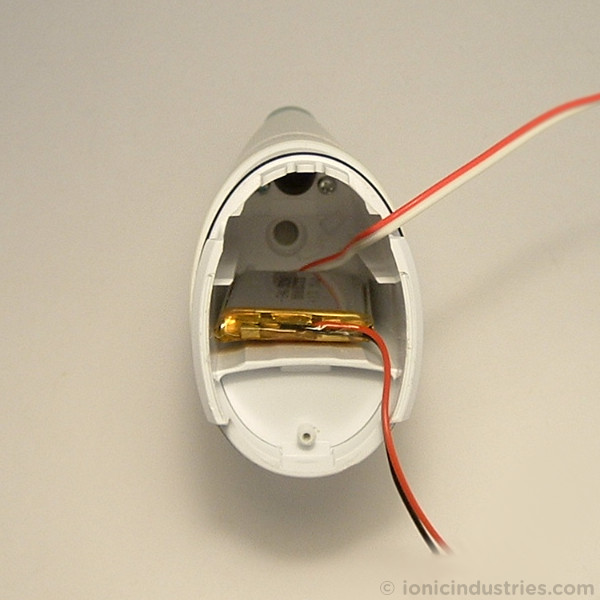
You can see the original battery inside the upper casing. It might be secured with double-sided tape.
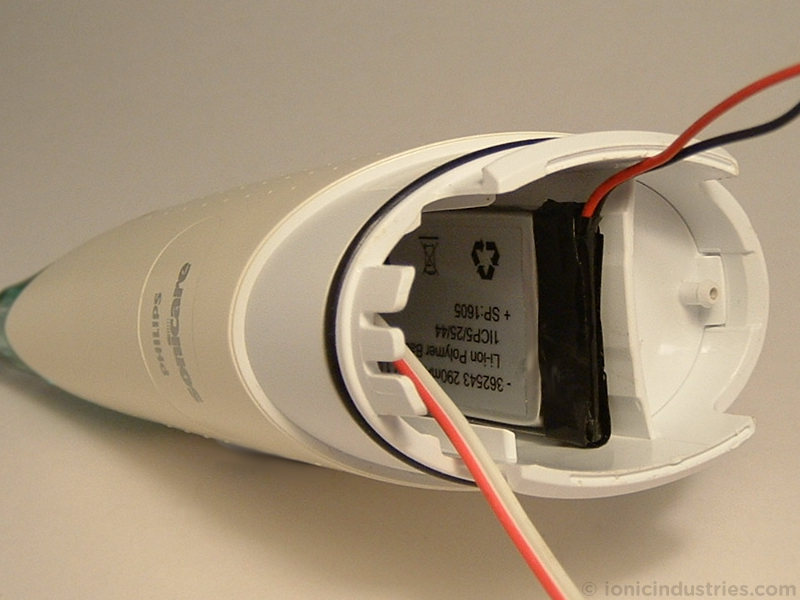
Unstick the original battery and remove it from the casing.
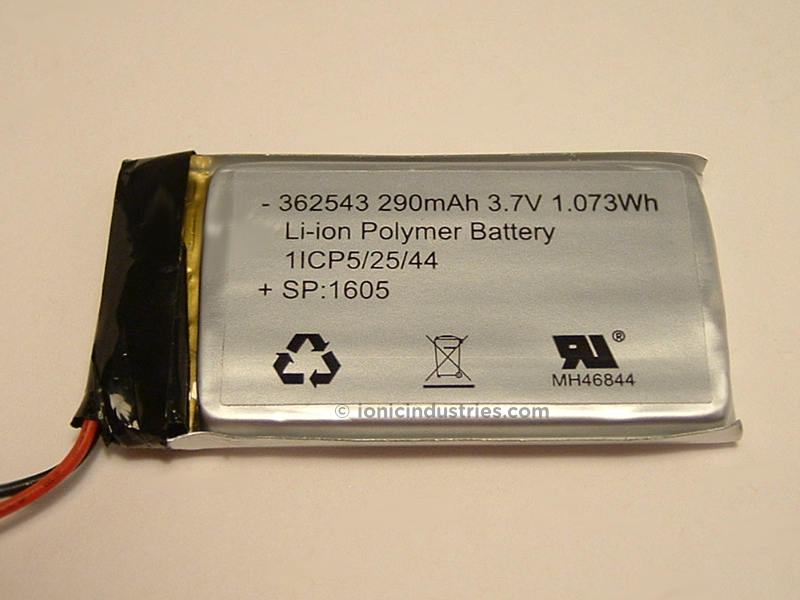
Compare the original battery to the new battery. This new battery is 500mAh capacity giving you a great upgrade in running time over the original battery. Please support us in writing these guides by buying your replacement battery from us here at ToothbrushBattery.com – Replacement AirFloss batteries.

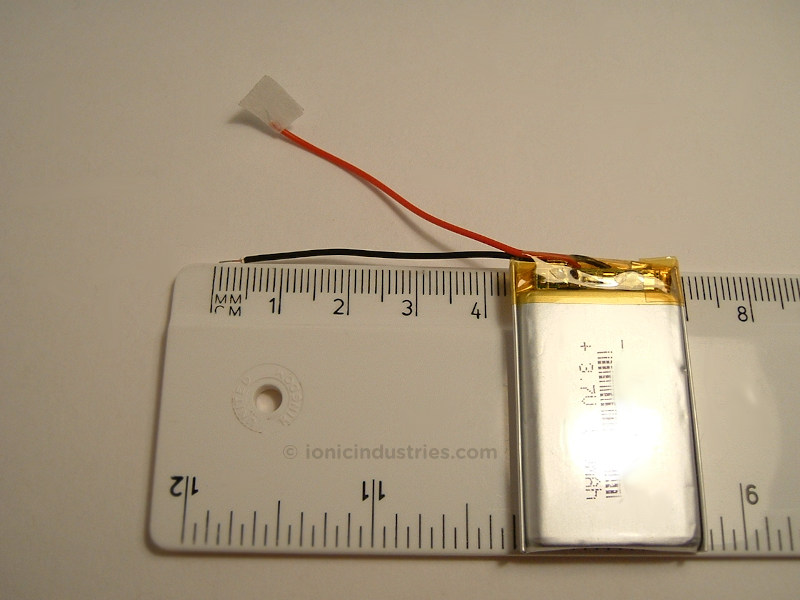
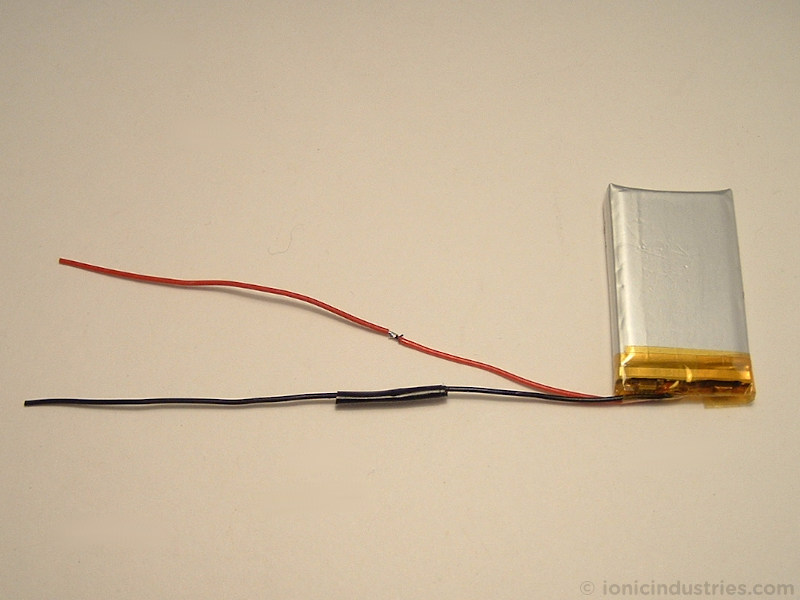
Measure the length of the wires on the original battery. In this case they are almost 10cm long.

Measure the length of the wires on the replacement battery. These are just over 4cm long.
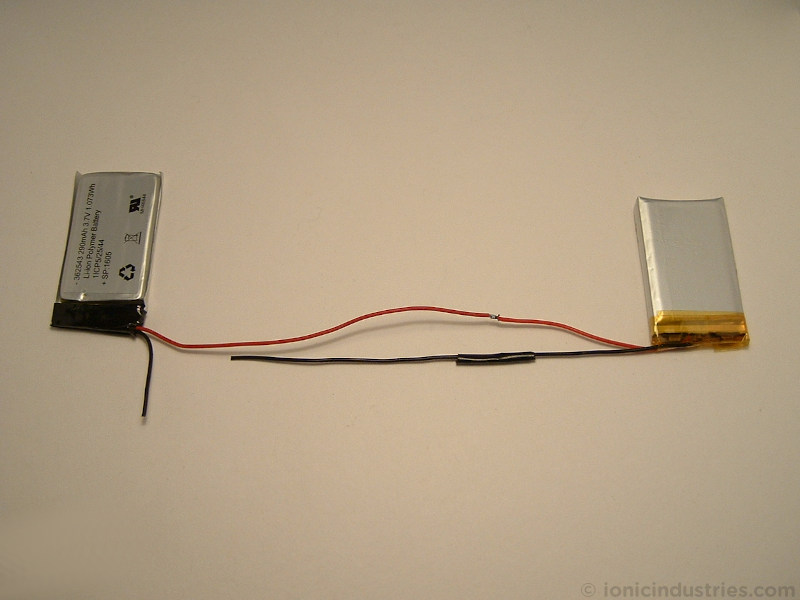
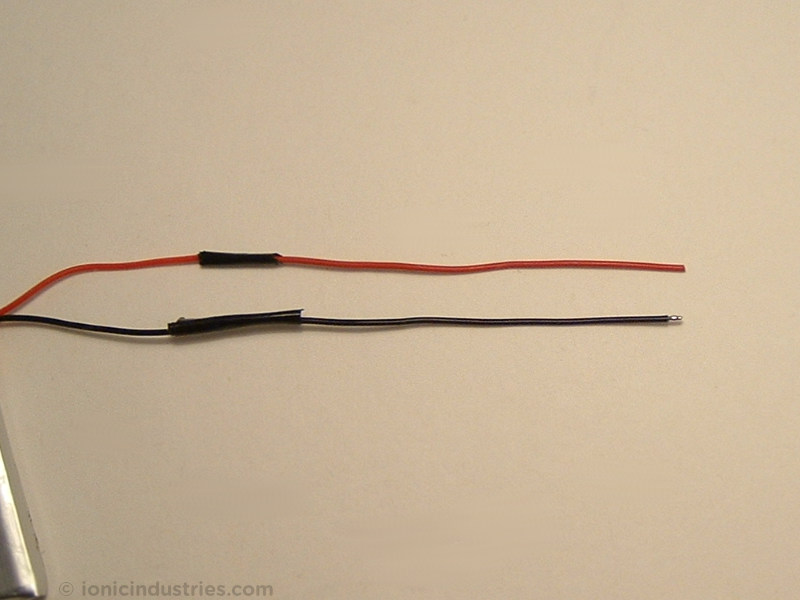
Starting with the black negative wire on the old battery, cut off enough to extend the black wire on the new battery, plus a bit extra just in case!
Solder the wire extension to the black wire on the new battery.

Insulate the solder joint by wrapping it with insulation tape or a piece of heatshrink. If using tape you can slightly melt the outer layer of the tape in one place by momentarily touching it with the side of your soldering iron tip. This stops the tape undoing itself in the future.
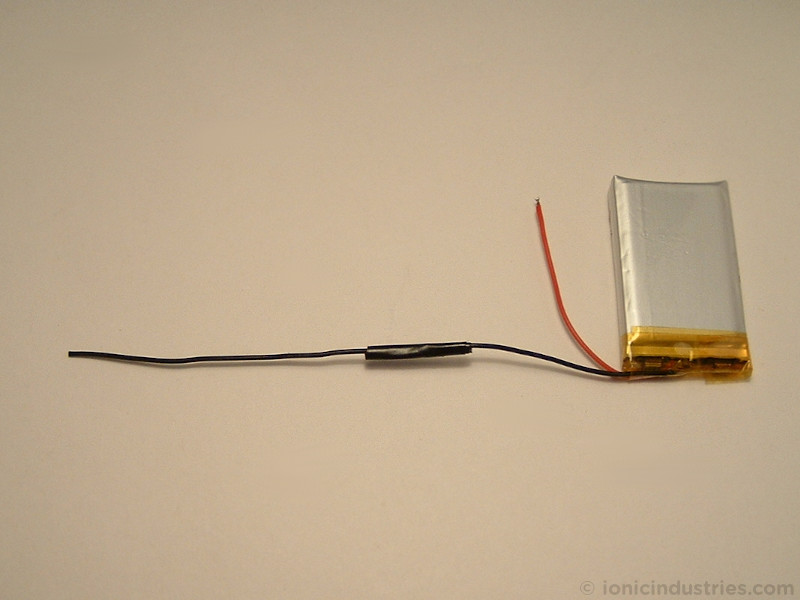
Do the same with the red wire. You can solder the old wire to the new battery before cutting it if you like.
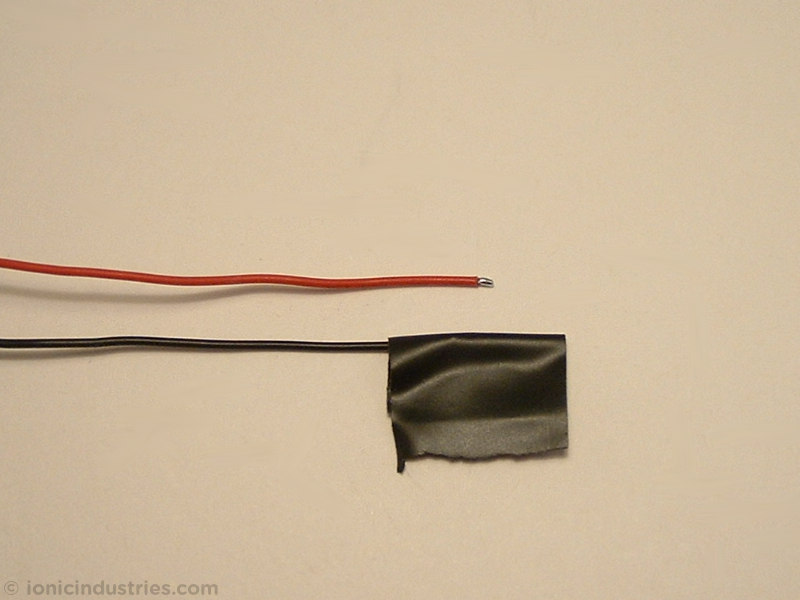
Strip and tin the end of the black wire.
Temporarily wrap the tinned end in insulation tape to prevent accidental short circuits. Strip and tin the red wire.
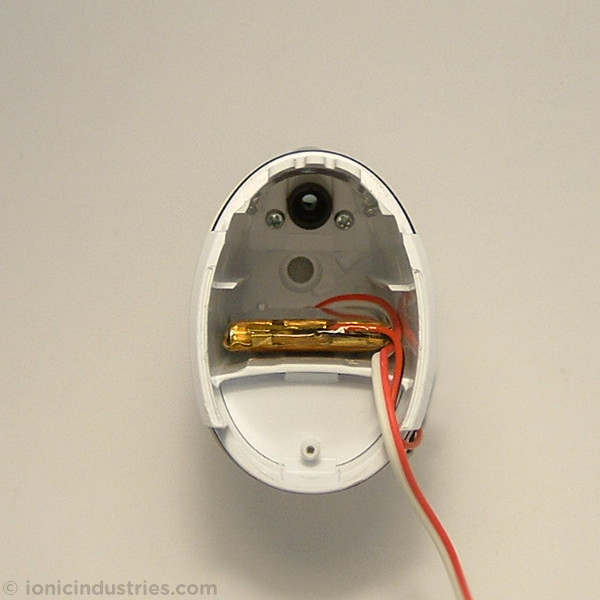
Add a piece of double-sided tape to the back of the new battery. Make sure the wires are pointing in the direction shown so you can determine which surface is the ‘back’.
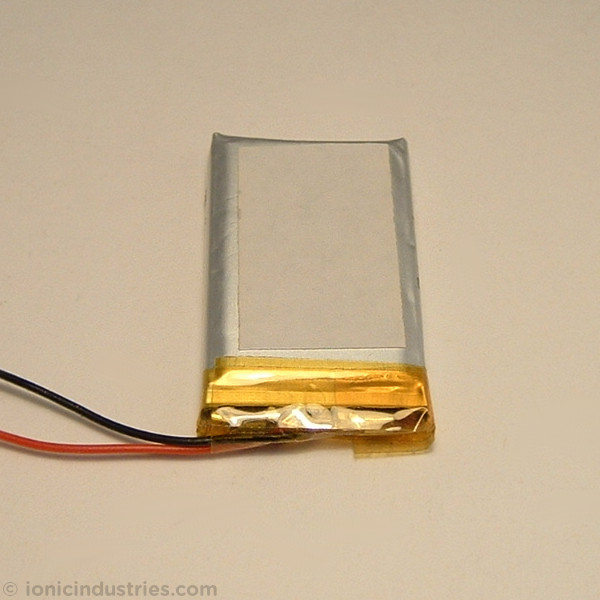
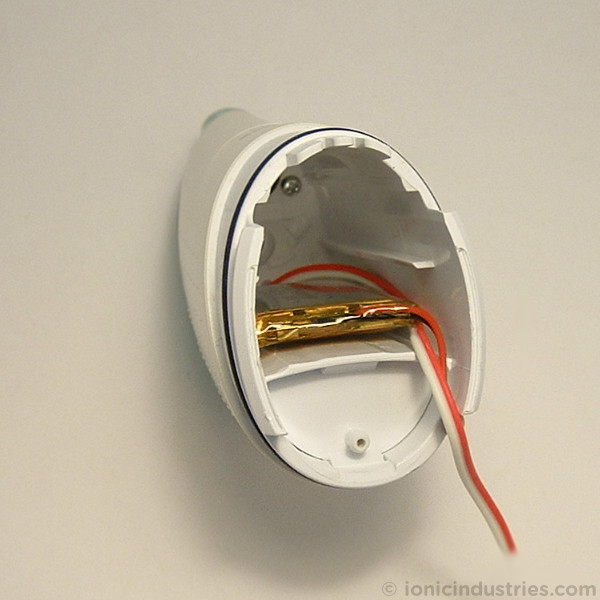
Slide the new battery to the far end of the casing and stick it in place as shown below, with its wires on the right.
Tuck the activation switch wires between the battery and the right hand side of the casing.
Check that the black grommets are still fully seated in either the upper casing or on the end of the internal assembly.
Turn over the upper casing so the battery is uppermost. Then, keeping the wires tucked to the left, slide the mechanism into the upper casing.
Keep the wires above the plastic tab (arrowed below) as you slide the mechanism into the casing.
Guide the flexible pipe towards the fixed connector outlet, and connect it up.

Once the mechanism is pushed fully home, engage the clip in the upper casing by moving the mechanism downwards inside the casing. This will close up the gap arrowed below.

Solder the red B+ and black B- wires into their PCB holes.
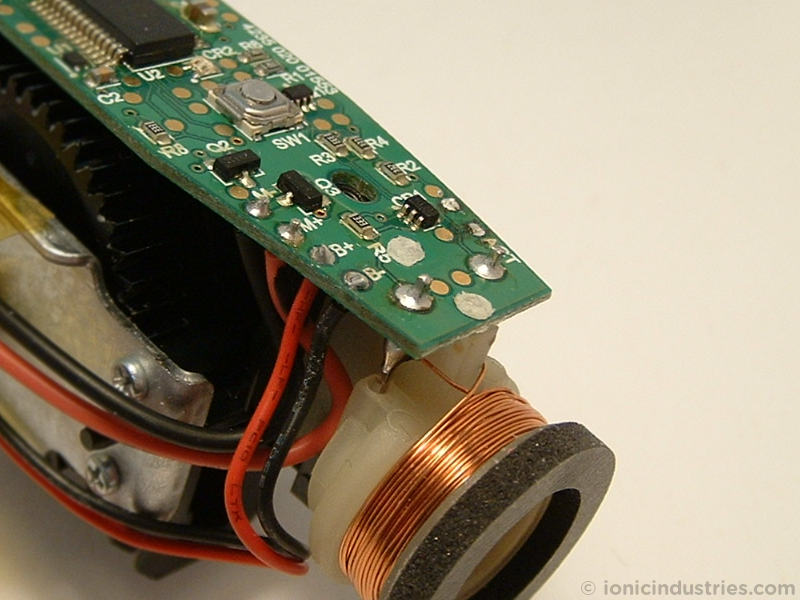
Route the two ACT wires under the charging coil and solder them back into their PCB holes.
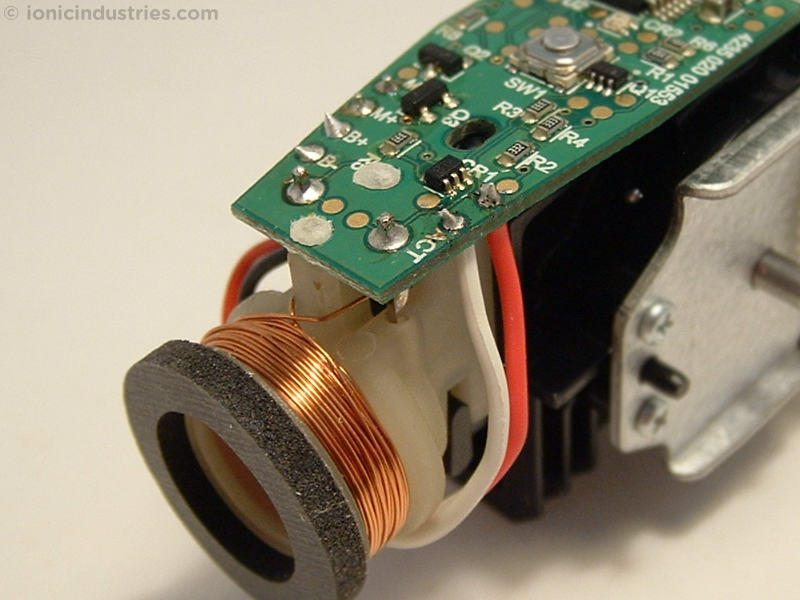
You can now plug in your charger and hold the exposed assembly on the charger. Make sure the charging LED on the PCB lights up (arrowed below).
Tape the loose wires onto the metal plate that supports the gearbox so they can’t get tangled in the gears.
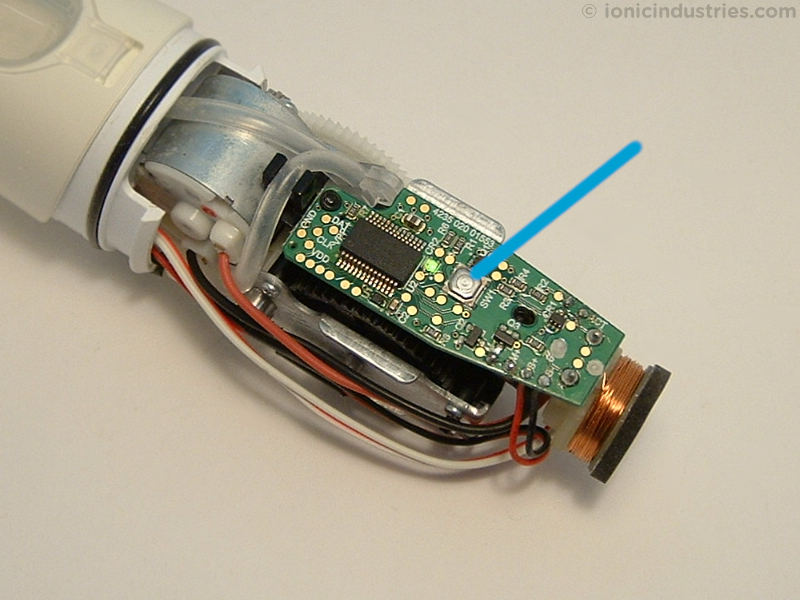
You can now try powering on your AirFloss by pressing SW1 on the PCB (arrowed below). The LED should come on. Press SW1 again to switch the flosser off off.
Slide the lower casing over the internals and clip the AirFloss back together.
You now have a fully reassembled Philips Sonicare AirFloss!
Test the AirFloss by switching it on and pressing the activation button on the top. You should hear it working as normal.
Put your AirFloss on for a full charge then it’s ready to use. Happy flossing!
Please recycle your old flosser battery. It is safest to tape over the exposed wire ends to avoid short-circuits. You can then take it to your local supermarket battery collection point or civic recycling facility.
Please leave any questions, tips or suggestions about Philips Sonicare AirFloss battery replacement below.
An excellent tutorial resulting in my successful replacement of a battery. Thanks indeed to the creator and all.
The easiest way to get it apart.
Twist the two sections in opposite directions until a small gap appears. Pour a very small amount of fairy liquid into the joint and work the two half back and forth. Then rinse in warm water and the fairy liquid will release the rubber seal and the two halves will come apart.
Thanks for the tip Roger!
Could you cut the existing battery wires and join/graft/solder the new battery wires to the cut ends to save a bit of soldering?
That’s the way to do it!
I found if you soak a flannel in hot water and wrap the lower casing in the fannel for a couple of minutes. Dry off the casing and pull apart, it comes apart alot easier.
Thanks for the tip Neal!
Do you have HX8460 SONICARE WATER FLOSS MOTHERBOARDS
See our Sonicare Spare Parts page for Sonicare PCBs (motherboards).
Much nicer than a YouTube video. You can spend time studying each step.
Thanks! Yes we prefer to publish photographic step-by-step how-to guides so people can follow at their own pace and we can give a longer explanation of the process.
I got mine open by simply bending it. The top, or outer part, of the bend is the plain side. The two halves pivot on the other side.
My issue is by sloppily filling the reservoir, I’ve let water get under the activation button. And it clogs up underneath.
Knowing that this button is problematic for me, I had another new AirFloss to use while taking this one apart. But the new one’s on-off button stopped working after a few days.
I’m going to give in and buy their new model. I certainly do like the AirFloss.
Ganz vielen Dank! Mit der glatten Seite nach unten drücken, vorher evtl. untere Seite mit wasser wärmen, hat wunderbar beim öffnen geholfen. Bei mir war ein piepen, ich hab durch den kleinen Ansaugschlauch geblasen, danach lief sie wieder.
Excellent tutorial one of the best I ever read. My HX8410 had stiff plastic, so the suggested methods to open it and in videos did not work – bending in the middle. What worked very well was to place reservoir down and then bend down the short side. It went loose direct.
I have replaced the battery, and it is charged OK, but when I try to activate a spray it shuts down like before. I have measured the resistance over the motor and it is only 0.7 Ohm. ChatGPT told me that the motor need to be replaced.
DC motors read a very low resistance or near zero ohms as the windings are just coils of copper wire. Check the PCB for signs of water damage which might be what is causing the issue. Also lubricate any mechanical parts.
Thanks! I seriecoupled two AA-batteries. which gave 3 volts, but the motor did not start except for the first attempt a very short while. ChatGPT told me that it would function on 3 Volts. When I removed the motor the resistance was 0.4 Ohm netween the wires.
Don’t trust ChatGPT about anything technical. It can be confident but wrong, and only regurgitates what it’s found browsing the web even if it’s not quite relevant. Does the motor need oiling on its bearings to free it up a bit? Only rechargeable or Alkaline AA batteries will have the oomph to power this type of motor while it’s trying to pull against that spring, and you’ll need a good electrical connection too.
I have put oil at the gear at let it work for a couple of hours and after that the motor started more often. Then I sprayed contact cleaning in the holes of the motor and after that it was much better. Some may be able to fix the motor by these advice. Sometimes the motor can’t be started but if I turn axis around for a while it starts directly again. It seem not to start in certain position. I have ordered a new motor Mitsumi M22 E-11 (R-14 A185 3.5-019-85T 16X2A 1E) with gear from AliExpress for 7 USD. Hopefully it will arrive 1-2 weeks. I am rather sure it will work.
AliExpress delivered the motor exact correct day (after 25 days) in a small letter in my mailbox. I tested the motor 5 times with a battery and it started each time.
It was the original motor Mitsumi M22E-11. However I think the motor is used, because the wires attached don’t looks new. I have attached the motor now with 3 screws, so it rather easy to exchange it. But the motor must be placed in a position so wires are closest to the PCB-board. To solder the motor wires to the PCB-board I had to remove the metal plate with 6 screwes first to be able to get the wires in their holes.
My first attempt to restore wires from motor, battery and ACT failed and it was dead. I had problems to put battery and ACT wires to the PCB-board. I had to remove one metal plate like when I added motor wires. Then I soldered 3 cm bits of wires to the PCB-board for battery and ACT. Put back the metal plate. Then I put in it in right place. Then it was easy to solder the wires and isolate them. After that it works normally again. The motor behaves exactly like earlier with identical sound.
It is great that this homepage exists so one can repair Philips Airfloss.
My Airfloss worked flawlessly, but suddenly the orange lamp blinked and it behaved strange. I remembered that a new battery should be charged for 24 hours and I had not done that. After 24 hours charging it behaved normally again.